Packing your own food for a road trip or extended adventure saves money and gives you control over what you eat, but keeping that food safe and fresh? That’s a genuine challenge. Temperature, time, and poor planning all work against you. Most travelers badly underestimate how quickly food spoils when it bakes in a warm car or sits in an underpacked cooler. Get the right tools and strategies in place, though, and you’ll eat well the entire trip instead of tossing half your supplies at a rest stop.
The Right Cooling Equipment Changes Everything
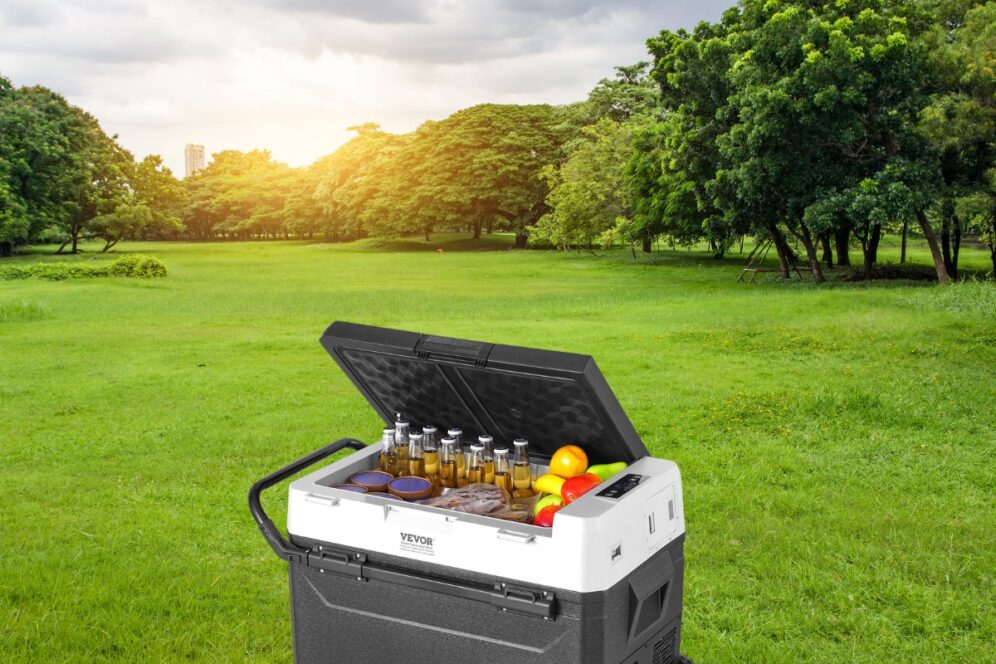
Your cooler choice matters more than anything else you’ll decide. A VEVOR portable car fridge or similar compressor-driven units from other brands run off your vehicle’s 12V outlet and keep a steady internal temperature no matter how scorching it gets outside, putting them in a completely different league from a passive ice chest. Passive coolers depend on ice that melts, creates water, and gradually loses cooling power. On trips lasting three days or longer, that equation gets expensive and messy fast. Compressor-driven portable fridges, by contrast, can hold temperatures as low as -4°F and actually keep contents refrigerated, not just cool. That consistency matters most for proteins, dairy, and pre-prepared meals, where bacterial growth becomes a real risk above 40°F. The USDA backs this up with food safety guidance. Your cooling equipment choice is the single decision that determines everything else on this list.
Passive Coolers vs. Compressor Fridges
Passive coolers have genuine strengths. They’re affordable, need no power, and work just fine for day trips or overnight stays where you can grab fresh ice easily. A solid, hard-sided cooler with two inches of insulation will hold ice for 48 to 72 hours in moderate conditions, especially if you pre-chill it the night before. Day three is where things fall apart, or in extreme heat like the desert Southwest in July. Melted ice soaks your packaging, speeds spoilage, and forces you to hunt down a store to restock supplies. Compressor fridges eliminate those problems entirely. They pull roughly 40 to 60 watts at peak use, about what a laptop charger draws, and most modern vehicles handle that without the battery taking a hit while you’re driving. But there’s a trade-off: upfront cost plus the need for a power source. For trips where you’ll be miles from any outlet or vehicle power for multiple days, a hybrid setup (a fridge for proteins, a separate dry cooler for drinks) tends to be the smartest play.
Ice Pack Strategy for Passive Coolers
No compressor fridge in your budget or cargo space? Then the ice pack technique becomes your most critical skill. Gel packs refreeze and don’t turn to water as they melt, yet block ice still outlasts cubed ice by far. In a 50-quart cooler, two or three block ice sections placed at the bottom will stretch cold retention well beyond what the same volume of cubed ice gives you. The detail most travelers overlook is layering: put your coldest, most perishable stuff directly against the ice, and stack shelf-stable snacks on top where temperature swings more. Pre-chill your cooler with a sacrificial bag of ice 12 hours before packing; that removes the ambient heat sitting in the cooler walls, which would otherwise melt your actual ice faster. Shade placement matters too. A cooler in a trunk hitting 130°F on a sunny afternoon loses its thermal edge quickly, so tucking it on the floor behind the front seats with a reflective barrier can stretch your cold retention by hours.
Smart Food Packing Keeps Temperature Consistent
How you pack food directly shapes how long it stays safe and fresh. Temperature consistency inside a cooler or fridge falls apart fast if you’re popping the lid open constantly or packing without an access plan in mind. The base rule is to pack in reverse order of use: the first meal you’ll eat sits on top, the last goes on the bottom. You’ll spend less time hunting with the lid open, which cuts down on warm air entering and cold air leaving every time you reach in. On a five-day trip with six cooler visits daily, those seconds genuinely add up to measurable heat loss. Vacuum-sealed bags are another tool most travelers skip. They remove air, cut oxidation, and squeeze bulky items like chicken breasts or leafy greens into flat shapes that fit tighter and hold temperature better than loose packaging does.
Pre-Trip Meal Prep Reduces Risk
Travelers who do meal prep at home before hitting the road deal with far fewer spoilage headaches than those packing raw ingredients and cooking on the move. Pre-made meals in sealed containers mean you’ve already controlled the initial temperature before anything hits the cooler. Food that starts cold stays cold longer; it’s that simple. And here’s the trick: pre-cooked proteins like hard-boiled eggs, sliced grilled chicken, or cooked pasta salads have already passed their most temperature-sensitive window. They hold up longer in a cooler environment. There’s a practical bonus too. Pre-portioned meals cut down how long your cooler stays open per access. You grab one container and shut the lid, not five separate ingredients for a sandwich left sitting exposed. Label your containers by day to prevent mix-ups and accidental cross-contamination when multiple people share a cooler. This kind of organization isn’t overcautious; it’s what separates travelers eating well on day four from those hunting a fast-food restaurant because everything went bad by day two.
Shelf-Stable Foods That Travel Well
Not every item in your travel food kit needs refrigeration. Know which foods are genuinely shelf-stable and you’ll free up cooler space for items that actually require cold storage. Good bets include:
- Nut butters in single-serve packets
- Whole fruits like apples, oranges, and bananas
- Crackers and whole-grain flatbreads
- Vacuum-sealed jerky and shelf-stable meats
- Instant oatmeal and granola portions
- Dark chocolate and mixed nuts
- Individual packets of olive oil, hot sauce, and condiments
These items handle ambient vehicle temperatures without any safety risk and pair well with chilled things from your cooler. The smart approach is building a “dry bag” that rides in the cab or cargo area separate from the cooler, so your cooler holds only items that genuinely need to be cold. Less volume in the cooler means the things inside stay colder longer, since there’s less air space warming up every time you crack it open.
Conclusion
Travelers who keep food fresh on multi-day journeys share a few core habits: they pick the right cooling gear for their trip length; they pack thoughtfully in reverse-use order; and they split refrigerated items from shelf-stable ones. Look, the answer isn’t some single product or magic trick. It’s a system of small, consistent choices. Pre-chill your cooler, pre-cook your proteins, minimize how long the lid stays open, and learn which foods don’t need cold storage at all. Nail those basics, and you’ll roll into camp on day five with food that’s actually worth eating.



Leave a Reply